

How To Repair Faux Marble In Shower
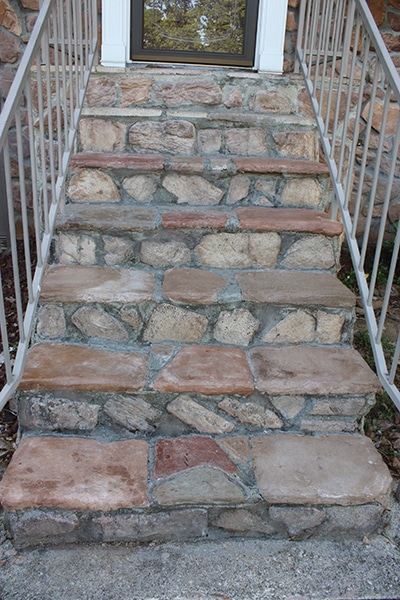
The front steps of our projection house had two issues: They were ugly and dangerous. We needed to make them pretty and safe.
The forepart wall and staircase of the carve up-level dwelling house had genuine flagstone veneer, but the stair treads were made of concrete faux stone. Since natural flagstone usually has an uneven face, the tread stones were probable molded from concrete to ensure they had a apartment, even surface for people to walk on. Nevertheless, over the decades the driving rain had pounded downwardly onto the confront of the treads and worn abroad the cement. The rain impairment allowed water to seep within the treads, freeze (and expand) during winter, and substantially annihilate the steps from within. The steps deteriorated to the point where a company stepped on a lower tread, and it crumbled below them. Luckily nobody tripped and injured themselves, only this repair could be delayed no longer. Here'due south how we tackled the problem.
Phase 1: Rock Replacement
Our kickoff problem was the lowest stair tread where some of the concrete had entirely disintegrated, fallen out and was beyond repair. Our only course of action was to chip out the remaining fabric and supersede it completely.

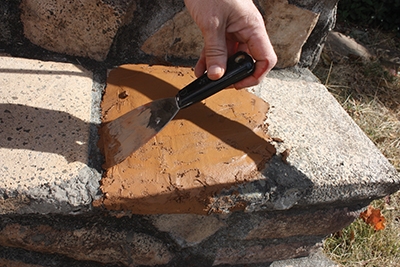
Using a hammer and chisel nosotros chipped away at the problem physical until we hit solid fabric—about halfway through the width of the tread. We then used a pocket-size handheld moisture saw to define the edges through the solid concrete. Later on hosing out and brushing away the droppings, nosotros had a one-half-moon shaped pigsty about six inches broad to fill.
One option was to build a form, whip up some colored concrete and cascade a replacement stone to mortar in identify. If that were to exist our approach, and then we should probably cutting out the rest of the imitation rock and mold the whole replacement using a single concrete color. That would exist risky, though, because further demolition threatened to dismantle the surrounding steps and riser stones, and nosotros did NOT want to rebuild the entire staircase; we wanted to repair it.
And then, nosotros tried our luck in a nearby creek and extracted an actual chunk of limestone from the mud bed. The rock had a adequately flat face up and roughly measured the correct size and shape (and fifty-fifty color) nosotros needed. This is the type of out-of-the-box solution yous won't find in a home-repair transmission, so we had to get artistic with how to spike the rock into to the steps.
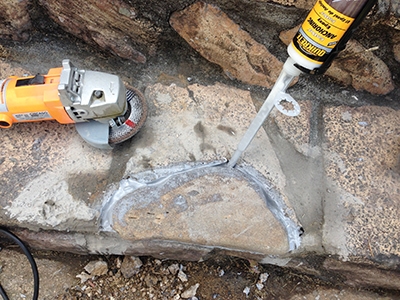
A quick trip the local home center produced the strongest adhesive nosotros could find at the fourth dimension: anchoring epoxy. This is a commercial-grade, fast-setting, two-part structural epoxy that's used for setting ballast bolts, threaded rods, railings and rebar dowels into physical and masonry. Seemed like tough stuff, so nosotros applied information technology liberally to the back and sides of the stone, but did not completely fill up the edges joints to get out room for joint mortar.
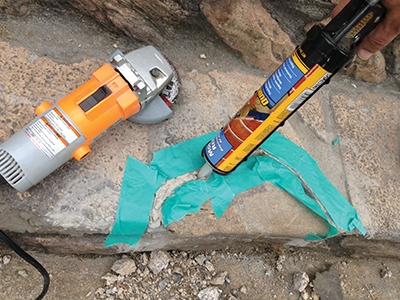
After the epoxy dried, we caulked the joints effectually the stone with repair mortar to lucifer the surrounding installation. The limestone patch concluded up blending well with the flagstone, so the repair was a success. Simply that was only the first phase of our project.
Phase two: Recoating the Faux Rock
Unless we fortified and resealed the other treads, nosotros would shortly be repeating the replacement procedure on the residuum of the steps. To avoid this, the steps need to be repaired with a hard, durable cement blanket that would bind with the existing concrete. The product besides needed to be tintable, and we'd demand to color the production in small batches to vary the tones and blend with the surrounding mixed-color flagstone.
Afterwards a little inquiry we came upwardly with an experimental recipe. The base was quick-setting cement, which comes in a bag that you mix with water. The cement was dyed with Quikrete Liquid Cement Color, which was added to the cement mix—and "a little dab volition exercise ya" because this stuff goes a long way. We chose two colors, Buff and Terra Cotta, which we combined in varying amounts to closely match the surrounding colour scheme. When working with pigmented concrete, proceed in listen that the color will lighten once the concrete dries.
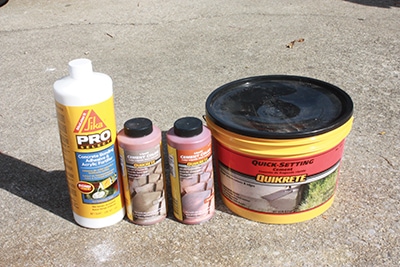
Our "hole-and-corner ingredient" was an acrylic fortifier. The Physical Bonding Adhesive & Acrylic Fortifier from Sika Pro Select is platonic for bonding new concrete to onetime. It's an of import additive to enhance the bond on applications less than an inch thick, similar this projection. We mixed it into the cement as a supplement to the h2o (following the directions on the package).
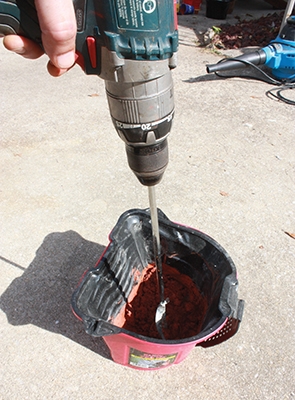
Utilise simply enough water to get the cement to the proper consistency, which should be something close to smooth peanut butter. To mix the product you'll need a bucket and powered drill equipped with a mortar paddle. Mix up only enough cement to use in nearly x minutes, otherwise it will start to dry out out and ready upwardly.
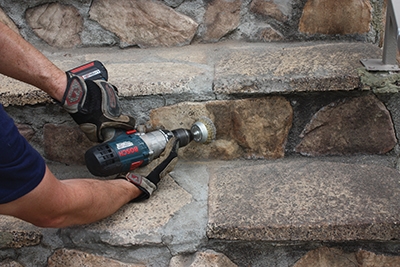
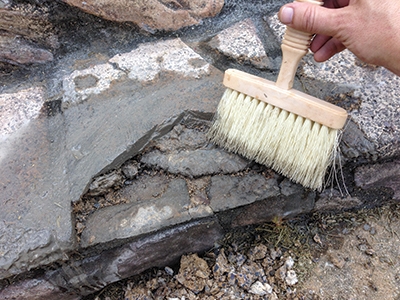
Prior to applying the repair cement, the old concrete surface should be cleaned of all foreign matter and loose materials. The bond will always be strongest if all smooth surfaces are roughened or etched, so nosotros scrubbed the steps make clean with a wire castor attachment in a power dill. Any dust must also be washed from the surface.
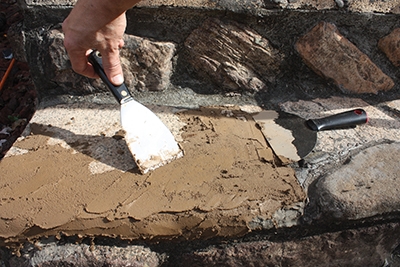
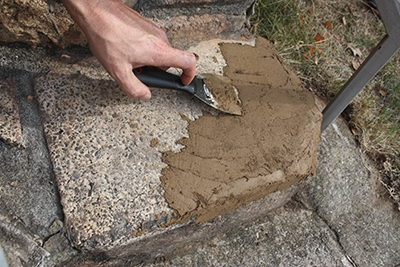
Nosotros then applied a new layer of colored cement over each individual tread rock, varying the color from stone to stone for a more than natural look. The repair cement applies hands with a putty knife, and the thicker the coat, the more durable information technology will be. Nonetheless, tread acme prevented us from raising the surface very loftier, so the coating stayed approximately 1/4-inch thick, and we feathered the edges thin most the mortar joints.
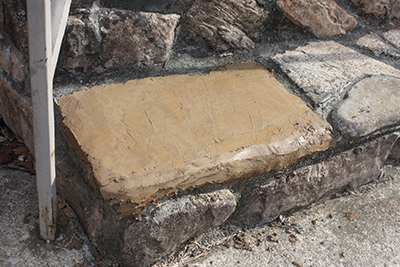
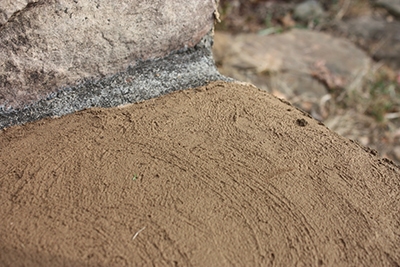
You lot can also alter the surface texture of the cement. Every bit the product begins to gear up, use a pocket-size broom to roughen the surface if y'all prefer a rough texture with better grip for walking. If, however, you'd rather have a smoother surface like that of weathered rock, and then glide a wet putty knife over the moist surface to flatten the cement as it cures.
Although this is fast-setting cement, we still recommend covering it in plastic sheeting to retain wet for the strongest cure.
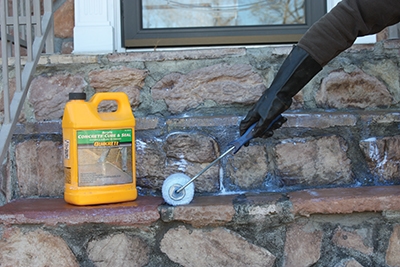
Once all the repaired stones had cured for 48 hours, nosotros coated the installation with a concrete sealer. We used Quikrete's Acrylic Concrete Cure & Seal, a clear acrylic coating that seals physical and masonry surfaces from water, acids, grease, oils, nutrient stains, table salt and more. This is a sparse liquid production that can be practical with a paint brush or roller.
Afterwards the sealer dried, the question remained: Would this repair last? Essentially, we had painted on a sparse cement overlay, and I was afraid the new layer might delaminate from the former concrete and chip off.
But and then far (knock on wood), that hasn't happened. At the time of publication this repair is six months quondam and has survived rain and freezing temperatures. The look of the treads is much improved, and the structure underfoot is much stronger and safer, which makes for an overall amend first impression of the home.
Side Note
 Repair Your Joints with Mor-Flexx
Mor-Flexx is elastic mortar that bends, stretches, and stays stuck right where you need it. It sticks to near surfaces, spanning a gap up to 3 inches wide. It won't slump, meaning you can apply it on vertical surfaces and not worry well-nigh it sliding down. Common surfaces for repair include stucco, rock, mortar in-between bricks, retaining walls, grout replacement along door thresholds, and the outside of fireplaces. Mor-Flexx is heavily textured to blend-in with these common surfaces. It'due south like shooting fish in a barrel to employ, and can exist blended with water on a cream brush or in a spray bottle. Mor-Flexx comes in grey or biscuit, but it'south also paintable. It has a unique finish-menstruation plunger that prevents the caulking from flowing when you cease pressing the trigger on the caulking gun. Plus, it cleans up easily with water. Acquire more than at www.sashco.com.

Source: https://extremehowto.com/repairing-faux-stone/
Posted by: allentiness.blogspot.com
0 Response to "How To Repair Faux Marble In Shower"
Post a Comment